Attention
This documentation is under active development, meaning that it can change over time as we refine it. Please email help@massive.org.au if you require assistance.
Using JupyterLab with Custom Minconda Environments in Strudel2#
Strudel2 provides a JupyterLab interface for accessing compute resources on the cluster. You can access a standard environment with pre-installed Python packages per the instructions at Using the JupyterLab Application in Strudel2. If the packages available in the standard environment are not sufficient for your research needs, then the custom JupyterLab option will enable you to use JupyterLab with a custom Python environment, allowing you to install packages as needed.
This page provides instructions for setting up your own custom JupyterLab environment on M3. Note, this functionality is still new - if you run into any issues, have feedback on this documentation, or have further questions, please reach out to us at help@massive.org.au.
Instructions to set up your own custom JupyterLab Miniconda environment#
1. Using the command line, set up your own Miniconda environment.
You can do this by following the instructions at
Running Miniconda on M3.
When you install your own Miniconda environment, an environment
called jupyterlab is automatically created. This is the
environment that will be used with your JupyterLab instance.
2. Activate your Miniconda install, and then activate your
jupyterlab environment. Once this has been activated, you can
install any packages you intend to use in JupyterLab in the environment. For example:
# Activate your Miniconda install
source activate /path/to/miniconda/bin/activate

# Activate your jupyterlab conda environment
conda activate jupyterlab

# Install packages as needed into this environment
conda install -c anaconda numpy
If you need to add packages to the environment in future, follow these instructions again to activate your environment and install further packages.
3. Access your custom jupyterlab environment in Strudel2 by
firstly navigating to to Strudel2: https://beta.desktop.cvl.org.au/login
Secondly, you will notice on the left hand side in the menu
options, a new option will have appeared. This new option
should be named after the location of your Miniconda installation.
For example, if you have a Miniconda environment in
/scratch/nq46/ksco0005/miniconda, your left hand side menu
will look like this:
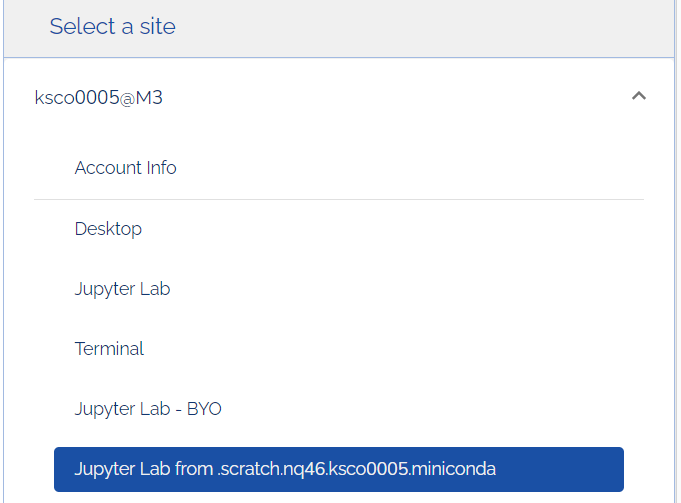
Click on this tab to access your custom JupyterLab environment.
4. Per the instructions at Using the JupyterLab Application in Strudel2 use the Strudel2 interface to select a GPU, adjust the amount of time you need your JupyterLab session for, and select “Launch”. Once your session has been scheduled and begins, select the “Connect” button and your JupyterLab session will open in a new tab.
You can confirm what packages are available in the notebook by
executing !conda list in a JupyterLab cell.
What if I want to use multiple environments with JupyterLab?#
Following the instructions above will allow you to use JupyterLab with the default
jupyterlab environment in your Miniconda install. However, you are able
to add additional environments to use with JupyterLab in Strudel2.
1. First, you will need to create an additional environment using Miniconda. You can do this by activating your Miniconda install, and then creating a new environment with JupyterLab installed - if you don’t install JupyterLab into the environment, the custom JupyterLab feature in Strudel2 will not work as expected.
# Activate your Miniconda install
source activate /path/to/miniconda/bin/activate

# Create a new conda environment
conda create --name newJupyterEnv python=3.6

# Activate the environment and install JupyterLab
# Also install additional required packages
conda install -c conda-forge jupyterlab
2. Once you have successfully created a new environment and installed JupyterLab,
you will need to run a script called add-strudel2-conda to add this environment to Strudel2
so you can use it with JupyterLab. You will need to specify both where your
Miniconda has been installed already, path/to/miniconda
and the name of the environment you are adding, newJupyterEnv.
# module load the conda install module again
module load conda-install

# run the following script, and specify
# 1. your miniconda install location
# 2. the name of the environment you wish to add, e.g:
add-strudel2-conda /path/to/miniconda/ newJupyterEnv
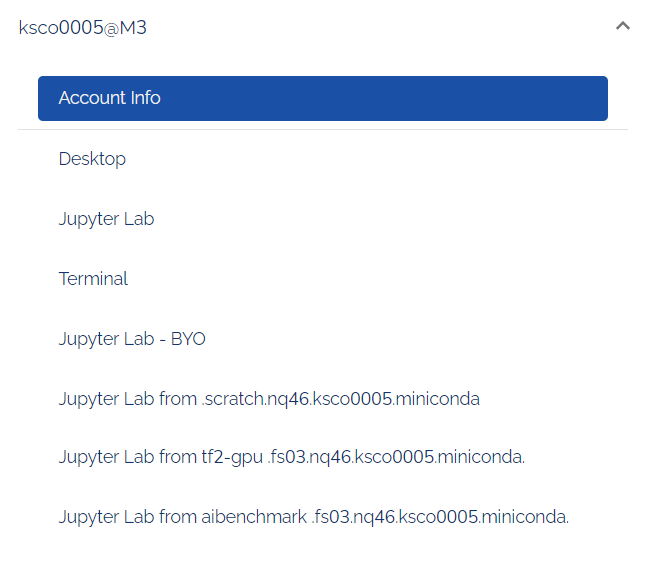
3. Once you have completed this step, when you open Strudel2 you will
see an option in the side for each additional environment. For example, this Strudel2
has 3 environments: the default jupyterlab environment, as well as one called
aibenchmark and tf2-gpu.
Select the tab from this list with your desired environment, and then choose your parameters, launch, and connect as usual. The ability to add multiple custom JupyterLab options is still new to Strudel2, so please email us at help@massive.org.au if you run into any issues or have further questions.